Friday, December 9, 2011

Selecting and care of Poinsettias

Selecting Poinsettias

Poinsettias are traditional Christmas plants that will last through the Christmas season and beyond. It is important to select the best plant for your home environment. The following are a few selection pointers:
Choose a plant with dark green foliage down to the soil line.
Choose bracts (modified leaves) that are completely colored.
Do not purchase poinsettias with a lot of green around the bract edges.
Do not choose plants with fallen or yellowed leaves
The poinsettia should look full, balanced and attractive from all sides
The plant should be 2 1/2 times taller than the diameter of the container
Choose plants that are not drooping or wilting.
Do not purchase plants that are displayed in paper or plastic sleeves. Plants held in sleeves will deteriorate quickly
Do not purchase plants that have been displayed or crowded close together. Crowding can cause premature bract loss
Check the plant’s soil. If it’s wet and the plant is wilted, this could be an indication of root rot
Check the poinsettia’s maturity. Check the true flowers which are located at the base of the colored bracts. If the flowers are green or red-tipped and fresh looking the bloom will "hold" longer than if yellow pollen is covering the flowers
When you take the poinsettia home, be sure to have it sleeved or covered when outdoor temperatures are below 50°F.


  Caring for Poinsettias


The length of time your poinsettia will give you pleasure in your home is dependent on (1) the maturity of the plant, (2) when you buy it, and (3) how you treat the plant. With care, poinsettias should retain their beauty for weeks and some varieties will stay attractive for months.
After you have made your poinsettia selection, make sure it is wrapped properly because exposure to low temperatures even for a few minutes can damage the bracts and leaves.
Unwrap your poinsettia carefully and place in indirect light. Six hours of light daily is ideal. Keep the plant from touching cold windows.
Keep poinsettias away from warm or cold drafts from radiators, air registers or open doors and windows.
Ideally poinsettias require daytime temperatures of 60 to 70°F and night time temperatures around 55°F. High temperatures will shorten the plant’s life. Move the plant to a cooler room at night, if possible.
Check the soil daily. Be sure to punch holes in foil so water can drain into a saucer. Water when soil is dry. Allow water to drain into the saucer and discard excess water. Wilted plants will tend to drop bracts sooner.
Fertilize the poinsettia if you keep it past the holiday season. Apply a houseplant fertilizer once a month. Do not fertilize when it is in bloom.

Monday, October 3, 2011

Pumpkins

Article from P.Allen Smith, photos are mine.

Pumpkins 101
I confess that I am obsessed with pumpkins. Whether it is a bowl of mini-pumpkins on a table, a stack of cushaws, luminas and blue hubbards by the front door, or a traditional Jack-o-lantern, there is no easier way to decorate for the season.
Growing pumpkins takes a lot of space, but if you've got it I recommend giving them a try.
Growing Pumpkins
Pumpkin plants like warm soil so set out plants about two weeks after the last frost date when the ground has had a chance to warm. The soil also needs to be fertile. Amend the planting area with a generous amount of compost or well-rotted manure. Unless your soil is nitrogen poor, don't add nitrogen. Too much of this nutrient will result in lots of leaves, but few flowers. Space plants feet apart or place one plant per hill. Make hills about three feet in diameter and six inches high.
Water early in the day and low to the ground using a soaker hose or drip irrigation. This will help keep the foliage dry and prevent fungal diseases like powdery mildew.
Pumpkins bear both male and female flowers. The female flowers are easy to identify by looking for a tiny fruit below the blossoms. Male flowers are borne atop a bare stem and often drop to the ground as they wilt. Bees and other small insects pay numerous visits, spreading pollen from the male flowers to the female flowers.
Harvesting Pumpkins
Pumpkins mature in 3 to 4 months, depending on the variety. A pumpkin is ready to harvest when it has reached the desired color and the rind is hard. You can test its readiness by jabbing your fingernail against the outer skin, or rind. It should be strong enough to resist puncture. Also, you can tell a pumpkin is ripe if you hear a hollow sound when you thump it.
Collect your pumpkins before the first frost or when night temperatures are expected to drop down into the 40s for an extended period of time.
Gently clean the pumpkins by brushing off any excess dirt and then place them in a dry, warm area for 7 to 10 days. This will heal scratches and further harden the rind, which helps reduce moisture loss. If a frost is expected, cover the pumpkins with a frost blanket overnight.
After they have been cured keep your pumpkins in a cool location (about 50 to 60 degrees F), out of direct sunlight with plenty of good air circulation. Stored this way, they should last up to 3 months.


Good to Know: Pollination
Lack of pollination is one reason pumpkin vines don't produce fruit. There are several reasons why pollination does not occur. Environmental conditions such as unusually hot or cool temperatures, excessive moisture or low light will reduce successful pollination.
Honeybees and other pollinating insects are invaluable helpers in the pollination process. If you use floating row covers, harsh insecticides or even organic insect repellents you reduce the ability of these garden helpers to get their job done.
If you are using floating rows covers to protect your plants from harmful insects, remove them when female flowers begin to appear. Repellents such as garlic spray should be applied a few days before the flowers open. And only spot use insecticides for problem areas.
You can also hand pollinate female flowers. Using a small paintbrush or cotton swab, collect the pollen from a male flower and transfer it to the top center of a female flower.

Monday, September 26, 2011

Fall Mums


Mums are an all time favorite flower in the fall because of their beautiful colors and   
perfect for mass plantings. To get the maximum effect from far away, stick to only one or two colors. Another possibility is to arrange a gradual transition of related colors. Look around your yard to see what colors would best complement the existing landscape. If you decorate for fall with pumpkins and gourds, choose orange, bronze, yellow, and creamy white mums. If you have a lot of evergreen plants that provide a backdrop of varying shades of green foliage, try bright pinks, lavenders, pure whites, or reds. With such bold colors, a large grouping of mums can excite even the most drab of fall landscapes.
  
Mums aren't as expensive as many perennials, so if you choose to, you can plant them as annuals without worrying that you've spent too much money on something that might not live more than one season. If you're an impulse buyer, you'll probably see pots of colorful mums this fall and not be able to resist.
Fall planting lessens the chance of winter survival, however, since roots don't have time to establish themselves. If you want something more permanent and are willing to provide proper care such as mulching and pinching to encourage compact growth and more blooms, plant mums in the spring and allow them to get established in the garden. This will improve their chances of overwintering and reblooming the next year. Some plants will even produce a few blooms in the spring before being pinched for fall flowers.

Ornamental cabbage

Ornamental cabbage is a hybrid flowering plant that produces red, pink, and white blooms in the cooler weather. They survive to temperatures as low as five degrees Fahrenheit. They are edible, although they are not as tasty as regular cabbage, and are mainly planted for ornamentation. Since they are low growers, they are often planted as edging plants. They must be started in the late summer to early fall to get the best blooming. They are often used as replacement plants in gardens and flower boxes for summer plants that are gone or dormant in the colder weather.   


Ornamental Cabbage looks very nice  in the garden with fall Mums

If you purchase the plants from a nursery, transplant them into your garden in September. If you plant too early, they will grow leggy and will not change color. Buy the larger plants as the cabbages will become root bound and the top portion becomes stunted and won't give you the growth you expect. Plant them in the ground about twelve to eighteen inches apart in a sunny area with nutrient rich soil that will remain moist but also well drained. The bottom leaves should actually touch the soil. Water well and cover the soil with mulch to retain moisture.

Friday, September 16, 2011

Cattails


Cattails are wetland plants with a unique flowering spike, flat blade like leaves that reach heights from 3 to 10 feet.  They are one of the most common plants in large marshes and on the edge of ponds.
Under the right conditions, cattails can grow and spread vigorously.  The pollinated flowers develop into fluffy seed heads, blowing across a pond in autumn breezes.  Just as commonly, cattails spread through their root system.  The thick, white roots, called rhizomes, grow underground near the edge of ponds and in shallow swales.  As long as the water is not too deep, the cattails feast off the open sunshine and abundant water, storing a large amount of food in the root system.  In fact, cattails at the edge of pond can grow faster than fertilized corn in a field!  

Cattails are a nice addition to a fresh, silk or dried late summer or autumn flower arrangement. Cattail stems blend well with sunflowers, zinnias, carnations, Gerber daisies, roses and lilies in yellow, orange and brown tones.
Cattails give a line of interest to the bouquet while adding an unusual natural element. The tall stalks are best suited to large floral displays in ceramic containers or baskets.

Wednesday, August 24, 2011

Magic Lillies

Magic lily or also known as Naked Lady

The five to seven pink four inch long trumpets are produced atop the pale, naked three foot tall stems start blooming in mid August.
The foliage comes up in late winter and looks like a large-leafed clump of daffodils, but without flowers. There will be one bloom for about every 10 leaves produced by the clump. The leaves die away with the arrival of the first warm days of late spring, usually disappearing below ground by late May. This growth pattern is an adaptation of the species to survive in an area with moist springs and prolonged periods of summer drought.

Magic Lilies (Lycoris squamigera) first appeared in the American garden trade in about 1880, but they have been cultivated for centuries in Japan. It was originally misidentified and sold under the name Amaryllis halli.
Magic lilies are easy to grow, doing well in any average garden soil in full sun or partial shade. They are sold in both the spring and the fall in garden centers. If plants are to be divided from a friend’s garden, dig the plants after the blooms fade in September. They require no fertilization and, as far as I have seen, are bothered by no pests.


Friday, July 22, 2011

Form V Artisan: How to grow amazing Basil indoors

Form V Artisan: How to grow amazing Basil indoors: "My favourite herb on this planet is Basil. Sweet Italian, Thai or Holy - it's all good and I love them all. I grow it at home. That way..."

Monday, June 13, 2011

Crazy Lilly

Look at this crazy Lilly it is almost 6 ft tall! I have never had a Lilly get that tall before, it must have loved all the spring rain!

Thursday, June 9, 2011

Great Garden Advice from Thomas Jefferson


Post image for Great Garden Advice from Thomas Jefferson 
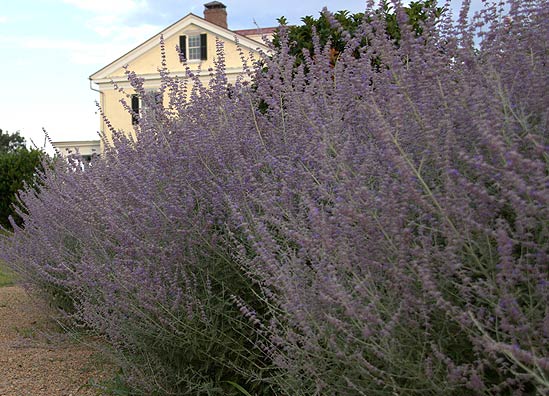
Thomas Jefferson, the third president of the United States, was the author of the Declaration of Independence and founded the University of Virginia. But he also was a highly knowledgeable gardener and farmer. At Monticello, he grew 330 varieties of vegetables, 170 fruit varieties and amazing flower gardens, such as these larkspurs (Consolida orientalis) growing in the west front of the property. Not surprisingly, this wise gardener practiced crop rotation in his garden too.
Photo copyright © Thomas Jefferson Foundation, Inc.

Crop rotation is an old method of rotating the edible crops grown in a certain place, so the garden soil stays fertile and healthy. Basically, you want to avoid planting edibles from the same plant family in the same place in your garden, more than once every three years – sometimes longer.
Aerial photo of mulberry row, vegetable garden and south orchard. Copyright Thomas Jefferson Foundation/Leonard Phillips.
To practice crop rotation, you’ll need to know the plant families of your edibles. Check here for that information. You’ll also need to keep good gardening records, so you’ll remember what you’ve grown over the years. That way you can avoid growing your favorite edibles and their siblings in the same spots in your garden.
Thomas Jefferson not only practiced crop rotation, but he also grew cover crops like clover and peas that added nitrogen and healthy organic matter to the soil.  These living mulches suppressed weeds, and attracted beneficial insects as well.
As he explained in a letter dated 1798, “My rotation is triennial… one year of wheat and two of clover in the stronger fields, or two of peas in the weaker, with a crop of Indian corn and potatoes between every other rotation, that is to say once in seven years.”
Using this method, wrote Jefferson, “aided with some manure, I hope my fields will recover their fertility, which had … been completely exhausted by perpetual crops of Indian corn and wheat alternately.”
Aerial of Monticello Mountain from South, with main house, vegetable garden and south orchard. Copyright © Thomas Jefferson Foundation.
Monticello Mountain from South, main house, vegetable garden, south orchard. Copyright Thomas Jefferson Foundation.
Learn more about cover crops, crop rotation … and Monticello.
Source of Thomas Jefferson quote – “Nature’s Bank – The Soil,” (National Wildlife Federation; 1953).

Monday, June 6, 2011

10 Must-Have Summer Perennials

by     P. Allen  Smith

SUN

Daylily (Hemerocallis sp.)

I'm excited that I now have developed 2 new varieties this year out of my daylily breeding program. I can't get enough of this old reliable favorite.

Hyssop Color Spires® Steel Blue (Agastache)

I love this plant. It has been a tremendous performer in my garden. No staking needed. After the flowers fade I cut back the old bloom stalks and it keeps on trucking.

Russian Sage (Perovskia atriplicifolia)

The wide drift at the farm is spectacular from mid May to late June. After the bloom I cut 25% off the top and it will flower again late August through September.

Mexican Sage 'Santa Barbara' (Salvia leucantha)

This plant is a mainstay in the late summer garden. It always gets comments from our visitors.

Summer Phlox (Phlox paniculata)

We trialed this variety Flame™ Purple last summer. It proved to be an excellent re-bloomer right through the intense heat we experienced in July and August.

Lamb's Ear 'Helen von Stein' (Stachy byzantine)

'Helen von Stein' has grown in the garden at the Garden Home Retreat for the last 5 years. Love the giant leaves and fuzzy texture.

Artemisia 'Powis Castle'

The frilly foliage looks great with Supertunia® Royal Velvet and Superbena® Royal Chambray Verbena.

Coral Bells (Heuchera sp.)

Heucheras are beautiful as singular sensations in containers. Plant 1 variety per pot. Many of the newer heucheras like Dolce® Key Lime Pie can take a half day of sun.

SHADE

Variegated Solomon's Seal (Polygonatum odoratum 'Variegatum')

The arching stems are a graceful addition to a shade border. Looks great poking up through hosta and ferns. Here I've combined it with Spanish bluebells (Hyacinthoides hispanica).

Hosta

Hosta are such a versatile plant. I use them in containers on my screened porch.

Hardy Cyclamen (Cyclamen hederifolium)

Subtle yet inspiring. I so enjoy seeing their pink blooms in autumn when the leaves begin to fall from the trees.

Chinese Ginger (Asarum splendens a.k.a. Hexastylis splendens)

This is a great low growing plant for shade. So easy and beautiful - I love foliage plants and this is a good one.

Saturday, May 21, 2011

More Irises


Edith Wolford, one of my all time favorites, so elegant and classy!

Old fashioned Blue Irises, they have  such a amazing fragrance.

Monday, May 16, 2011

First Irises of 2011


Despite all of the rain and the now 40 degree weather, My Irises have finally started to bloom. I am so glad they made it through the  long winter and and the very wet spring!

Thursday, May 12, 2011

Allium

From the family of onions, the allium flower was incorrectly grouped with the lily family. This was a mistake, of botanical proportions! Botanists recently have transferred this beautiful plant to its rightful family and thus reunited the allium flower with its previously, estranged, family grouping.
Allium flowers are beautiful specimens and have been the favorite of many magnificent artists, such as Rembrandt and Baker, who immortalized alliums in spectacular works of art.
Many growers of alliums also cultivate this member of the onion-genus for its beautiful flower blossoms. The flowers form an unmistakable and unique round-area, at the very top of the bloom, in which is known as the umbel region, of the flower.


Prized for its beauty and non-onion aroma fragrance, the allium flower is used in many perfumes and cosmetics products throughout the world. The ancient native Indians of Peru use this flower for medicinal as well as religious purposes and it was seen as one of the most import plant species of the Mayan culture. 
Allium flower species are considered great gardening plants with flowers that are produced in the summer and fall in most regions.
The allium plant is seen by many individuals as a great pharmaceutically-important plant organism. This may be from the vitamin content that naturally is a part of the allium flower's biogenic makeup, or could be that when reacting with certain tissues of the body, defends against some infections and diseases. 

With more research on the allium flower it is undoubtedly going to yield more surprises in the medical community and hopefully more relief for those that suffer from skin rashes and psoriasis. The allium comes in a variety of colors, with white being the most predominant, and blue and yellow, along with purple varieties, which are beautiful to see in full bloom during the hot summer months. Many of the varieties of allium flower, such as the ‘Purple Sensation’ are one of the most popular and have even been given the prestigious ‘European Gardening Award of Garden Merit’. This means that this plant is not only royalty, yet is strong and can grow under a variety of temperate conditions. 
Many gardeners feel that the ‘flower’ is the only commercial crop available from the entire plant, and consider the plant a nuisance otherwise. Dogs and cats need to steer clear of the allium flower, as death by poisoning, is a common occurrence for dogs and cats that ingest enough of this powerful, and native plant.

Monday, April 18, 2011

Herb Hanging Basket

Here is a great idea by P. Allen Smith   
Here's an idea that allows you to grow herbs literally above ground. A hanging basket in a sunny spot makes use of the vertical spaces in your garden, patio or balcony.

Materials for an Herb Hanging Basket

  • Herbs with a cascading form such as thyme, oregano, sage and parsley
  • Hanging basket
  • Coco liner
  • Potting soil

Directions for Planting an Herb Hanging Basket

Line the wire basket with a coco liner. These will be available wherever you can purchase wire baskets or through online retailers. The coco liner holds the soil in place, while allowing water to drain through.
Fill the basket half-full with potting soil and use potting soil, not garden soil. Not only will the basket be lighter, but potting soil drains better than garden soil.
Plant your herbs and back fill with soil. Leave about 1 inch of space between the soil line and the lip of the basket. This will keep water from spilling over the sides.
Water well and hang in a place that receives at least six hours of sunlight.
Now you are all set to have fresh herbs at your fingertips all summer!  
http://www.pallensmith.com

Wednesday, April 13, 2011

Mystery plant in my garden

I had this cute little Daffodil type flower come up in my garden , it was a nice surprise to watch it open, but still don`t know what it is !


Saturday, March 26, 2011

Coneflowers / Echinacea

"Purple coneflowers have been one of the top-10 selling perennials for years," says Bobby Saul, an owner of ItSaul Plants in Atlanta. "We started breeding new selections several years ago, and the results are these shades and the beginning of a new era for this favorite flower."

The romance of these coneflowers goes beyond color. "As we developed the new hues, we also discovered fragrance the purple selections only hint at," Bobby says. It becomes most prominent in late afternoon, when flowers warmed by the sun give the air a sweet, unexpected scent.
These new coneflowers also cut like a charm. Snip a few stems as they open, and they'll last in a vase for at least 10 days. The colors combine beautifully with other garden flowers and herbs for stunning mixed-bouquet potential. Few summer blooms produce the color range these selections posess.
Coneflowers grow enthusiastically . Here are Bobby's recommendations for success.
  • Well-drained soil: This is a must for long-lived plants; many times they will fail due to excessive moisture in the soil.
  • Sunlight: Full sun (at least four hours) is best to ensure strong plants and sturdy flowers.
  • Fertilize: Don't go overboard. Feed with an all-purpose granular food (such as 14-14-14) in the spring and once again in midsummer.
  • Maintenance: Once blooms fade, deadhead them at the bases of the stems. New buds will follow. Tall flowers that aren't in full sun may need stakes for support.

 July 2007 issue of Southern Living.

Tuesday, March 22, 2011

Pheasant's Eye Narcissus/Daffodil

did you know?
"Daffodil" and "narcissus" are different names for the same flower


This large white daffodil, which is also sometimes called the Poet's Daffodil, is a charming combination of white petals, red and yellow rim to a cup with a surprising bit of green inside. The green of the inside cup, or "eye", is what gives the Pheasant's Eye Daffodil its name.
These are beautiful to see bloom in the garden.

The scent is fabulous and the flowers are lovely either in the garden or in a vase. 2 or 3 blossoms in a room will scent the whole room.
These are beautiful to see bloom in the garden when planted  in naturalized drifts.
You do not want to plant daffodils in straight lines, and when you see a cluster of these exquisite daffodils come up in the springtime you'll be charmed both by their unique look

Saturday, March 12, 2011

Growing Impatiens in a container


For those with a limited growing area or  shade to part shade area, or other who have a patio they would like to add some color and beauty too, impatiens are an excellent container flower.  I love this flower, it really brightens up a dark area! Water daily and a little plant food once a month and it triple in size and be happy  : )


Tips for Container Gardening          
When putting planting a container garden, real soil is a no-no.
Instead, choose a soil-less mix – a lightweight combination of peat moss, vermiculite and perlite – sold as patio or container mix.
The potting mix should be fluffy and just moist for planting.
Place a piece of broken pottery or small stone over drainage hole to prevent mix from leaking out.
 
Fill container three quarters
with potting mix, keeping it fluffy (don’t press down too hard). Remove plants from pots, gently teasing roots apart if necessary, and place inside container.

Container garden plants are asked to produce masses of flowers in a tight space, so be sure to fertilize. The easy way is to mix slow-release fertilizer pellets into the top couple of inches of potting soil. (Follow package directions for amount.) The fertilizer beads are covered with a coating that gradually releases nutrients all season long.

Fill gaps between container garden plants with potting mix, firming down gently. Avoid packing pots right up to the rim – leave about an inch free as a reservoir for easier watering.

To finish, water. Throughout the season, check your container garden pots daily and water until water comes out through the drainage hole.

Different types of pots to use
Terra cotta: A time-honored classic material that’s porous and allows oxygen to get to roots. However terra cotta is heavy and easily chipped or broken and generally not frost-proof, so store indoors in winter. The best terra cotta comes from Italy.

Glazed ceramic: This material has the same advantages and disadvantages as terra cotta. Available in many attractive colors. Not frost-proof, needs indoor storage for winter

Plastic and molded polyethylene (fake terra cotta or stone): Light, easy to move, polyethylene looks like real thing. It doesn’t chip or break and is frost-proof. Not porous like terra cotta, so good drainage is essential. Raise pot on blocks so drain holes not obstructed. Go for quality as cheap plastic pots degrade quickly in UV rays

Wooden barrels & window boxes: Attractive, readily available; can be built to sizes and shapes that suit the location. Large-sized containers heavy to move. Deteriorates quickly unless protected from moisture, so line interior with plastic sheeting